How to Configure WP Super Cache Correctly
WP Super Cache is one of the most efficient caching plugins for WordPress. If your site loads slowly or visitors see outdated content, a proper configuration can fix it. This guide shows you how to set it up correctly.
When Do You Need to Adjust WP Super Cache?
- The site takes too long to load.
- Changes are not reflected immediately.
- Errors such as blank pages appear.
- The server has high load for no apparent reason.
Recommended Configuration
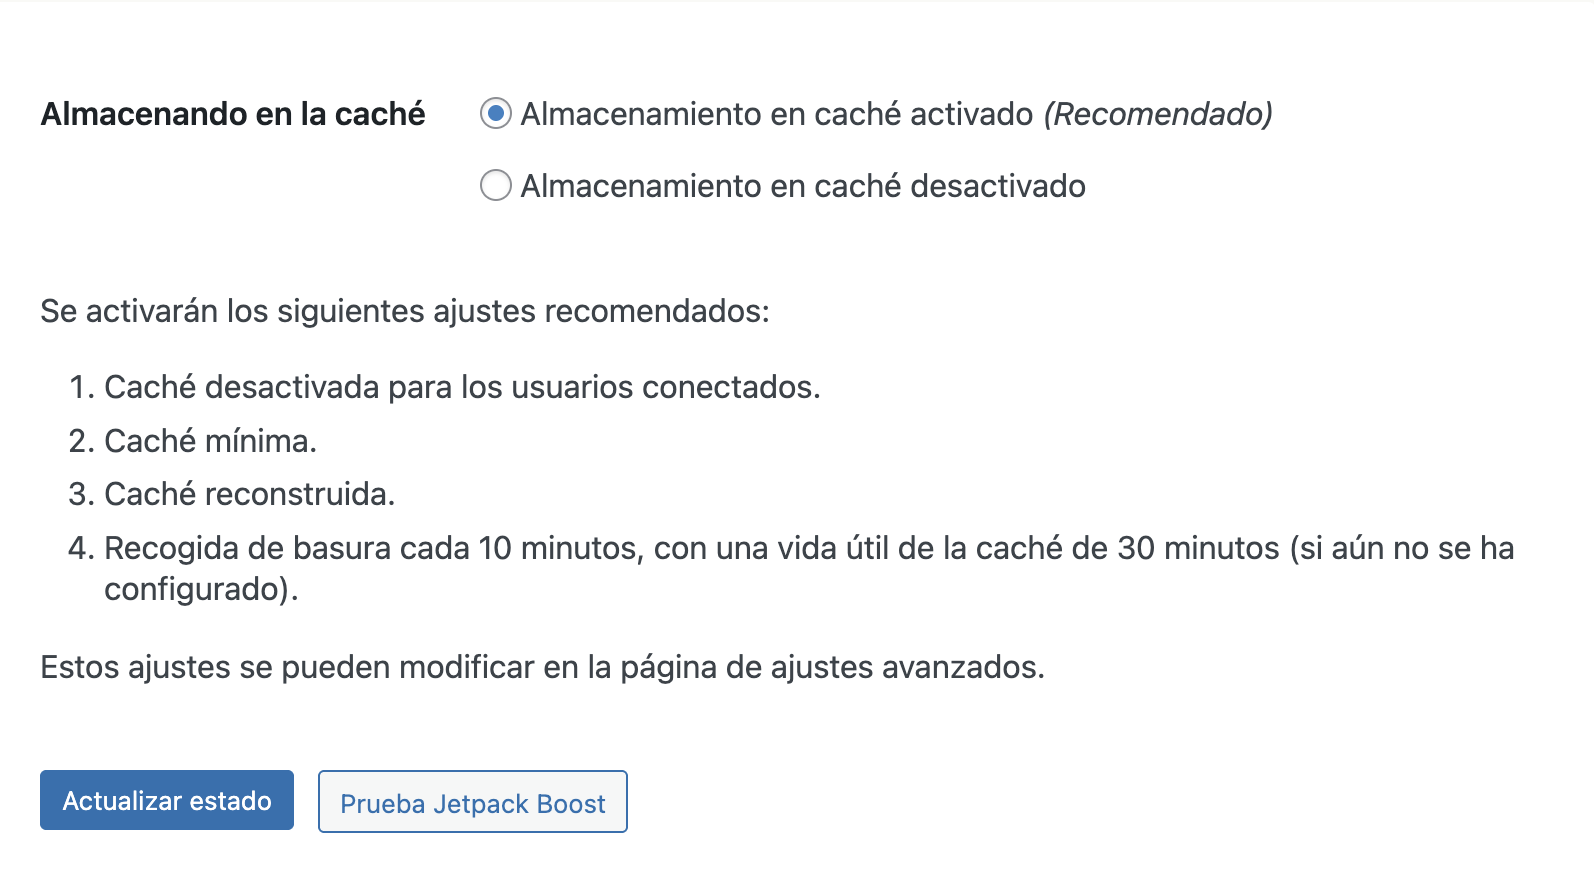
1. Enable Cache Mode ("Easy" Tab)
> ✅ Enable "Caching On"
> Click "Update Status"
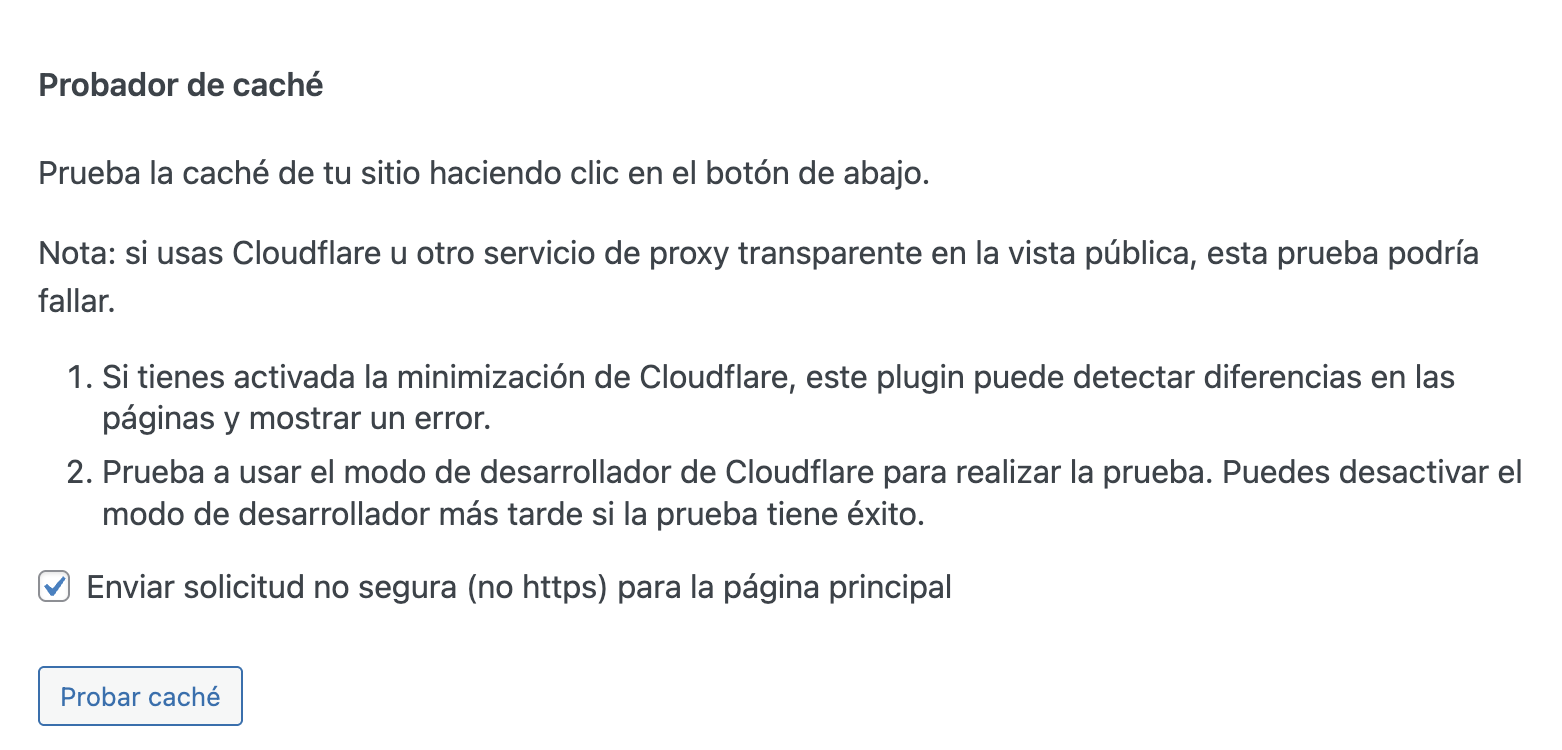
> Click "Test Cache" to confirm
2. Advanced Settings ("Advanced" Tab)
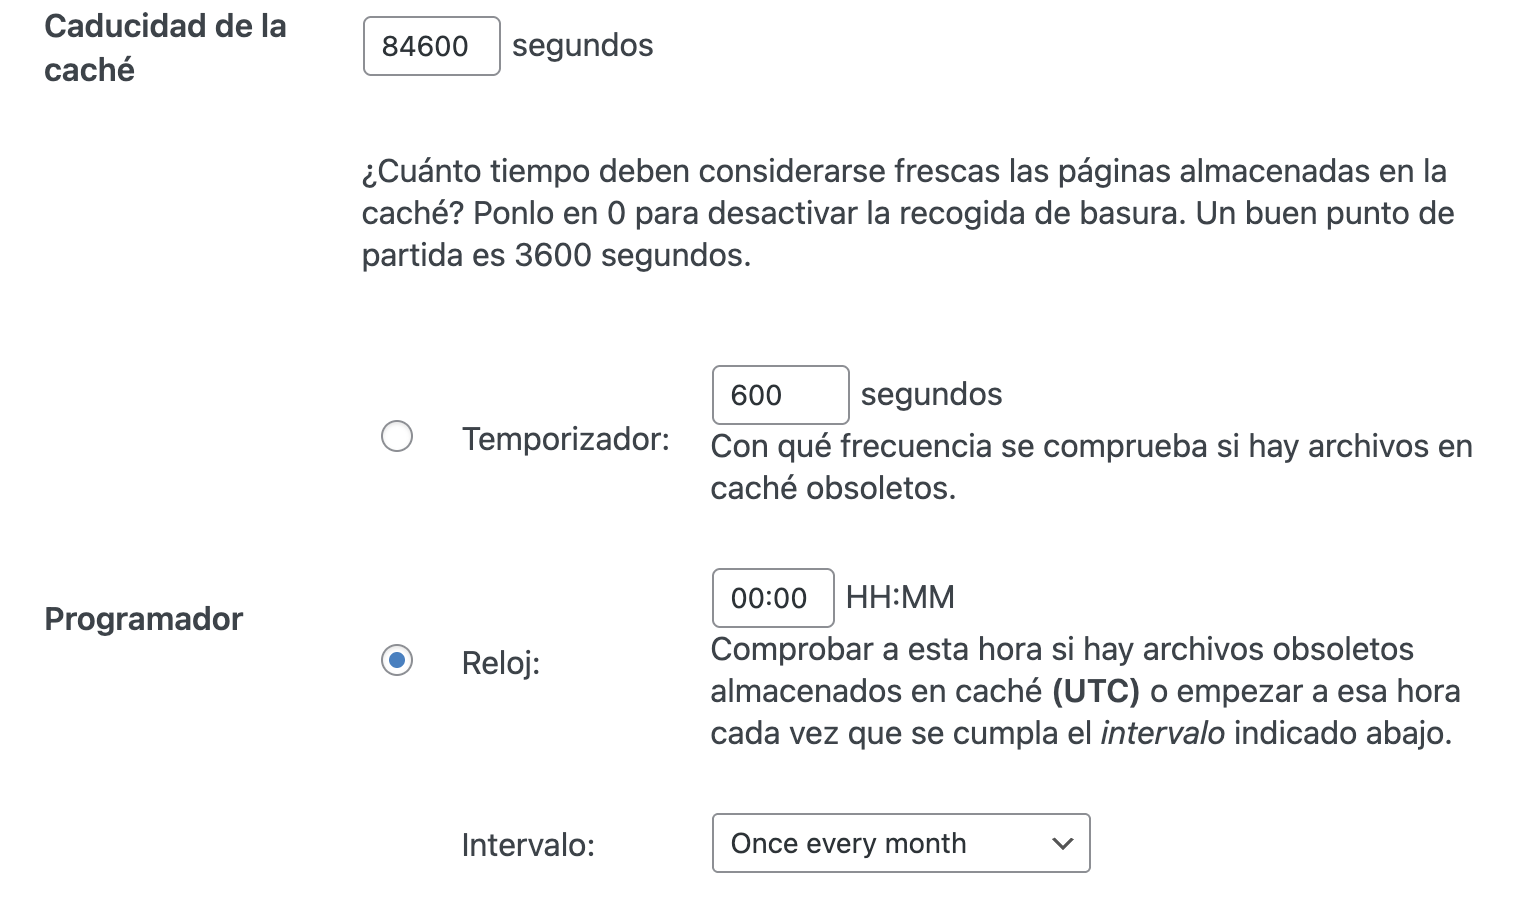
> ✅ Enable all recommended options.
> Expiry time: 86400 seconds (24 hours).
> Schedule cleanup: Once a month at 00:00.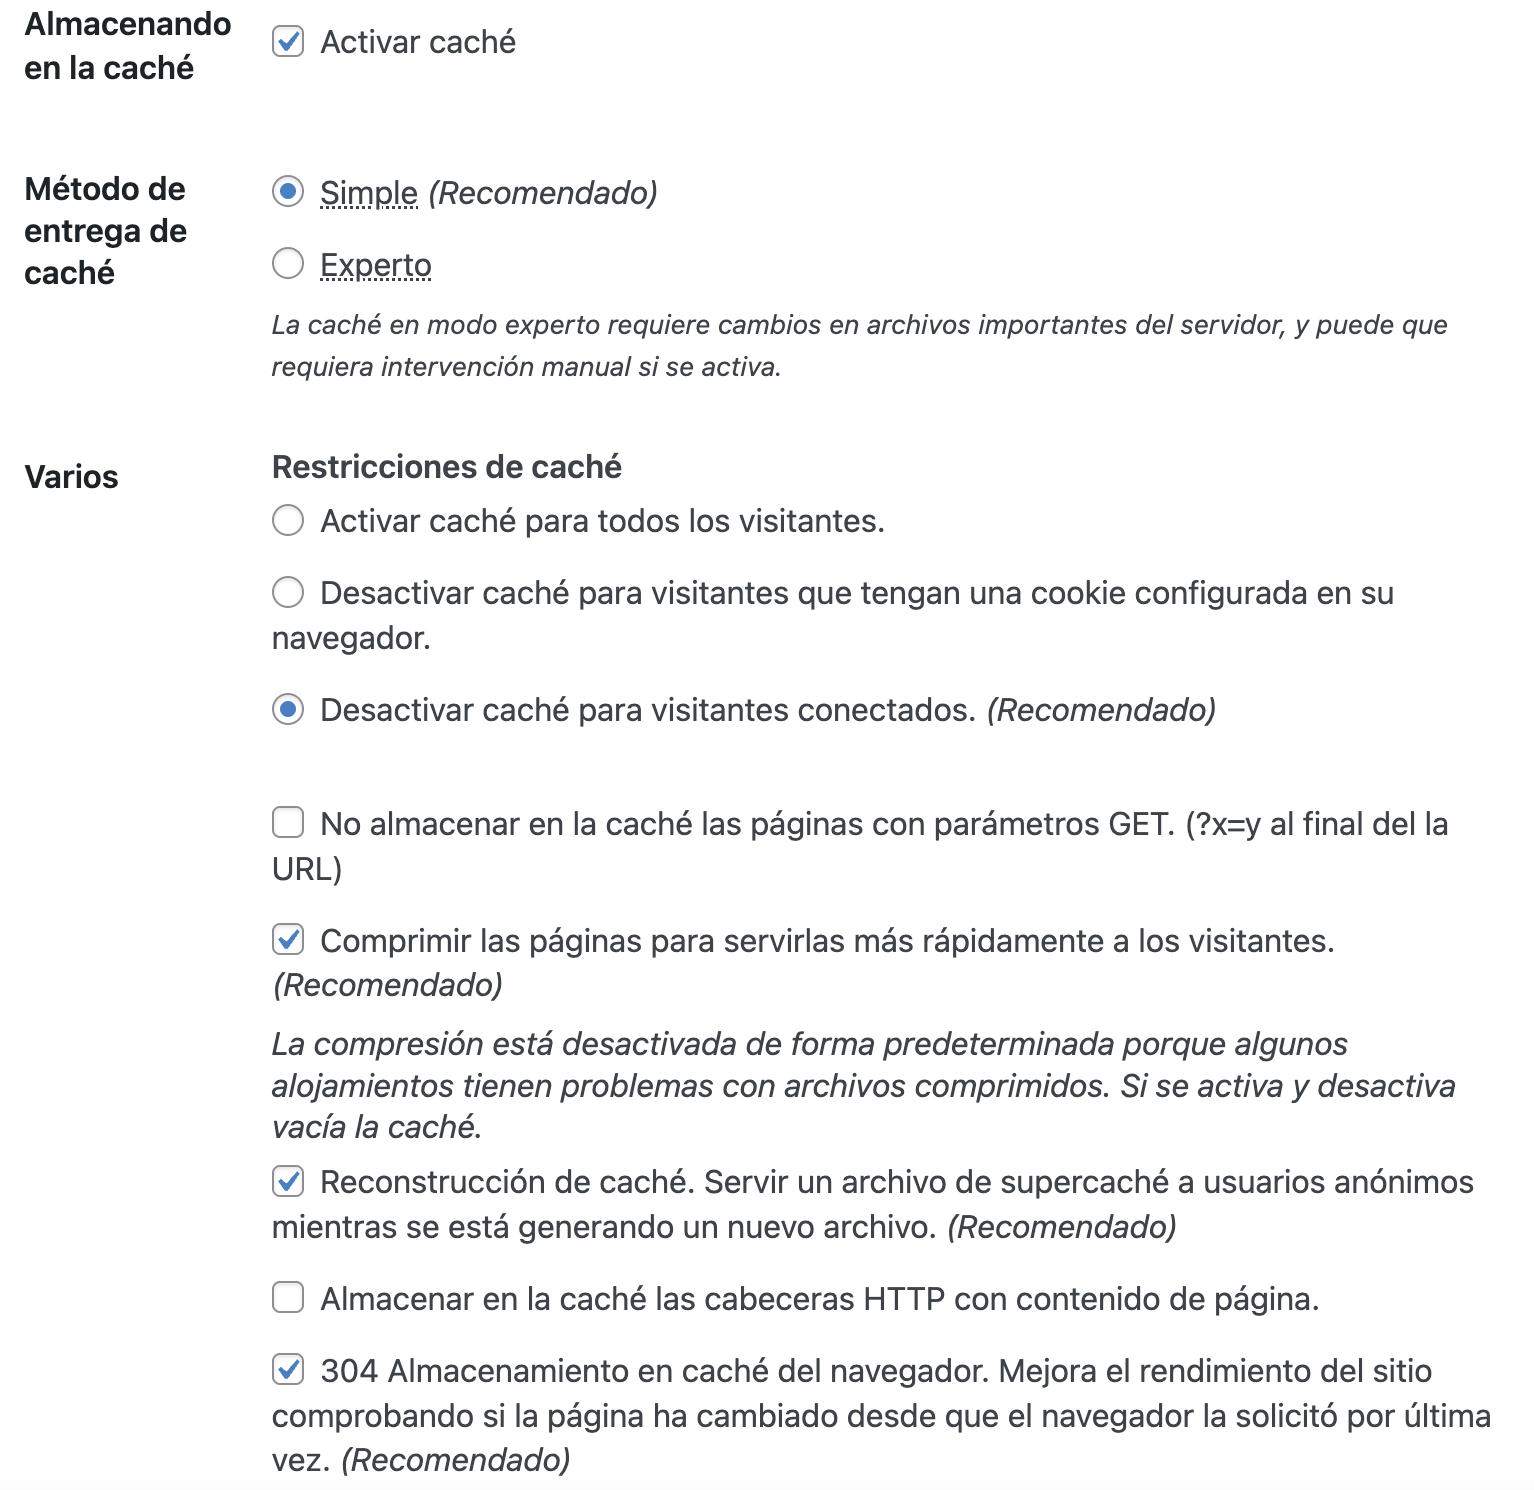
3. Clear the Cache ("Contents" Tab)
> Click "Delete Expired"
> Click "Delete Cache"
4. Preload Cache ("Preload" Tab)
> Refresh preloaded cache files every: 0 (disabled, to avoid overload)
> ✅ Enable "Preload mode" (no garbage collection)
> ✅ Enable "Preload tags and categories"
> Save changes
> Click "Preload Cache Now"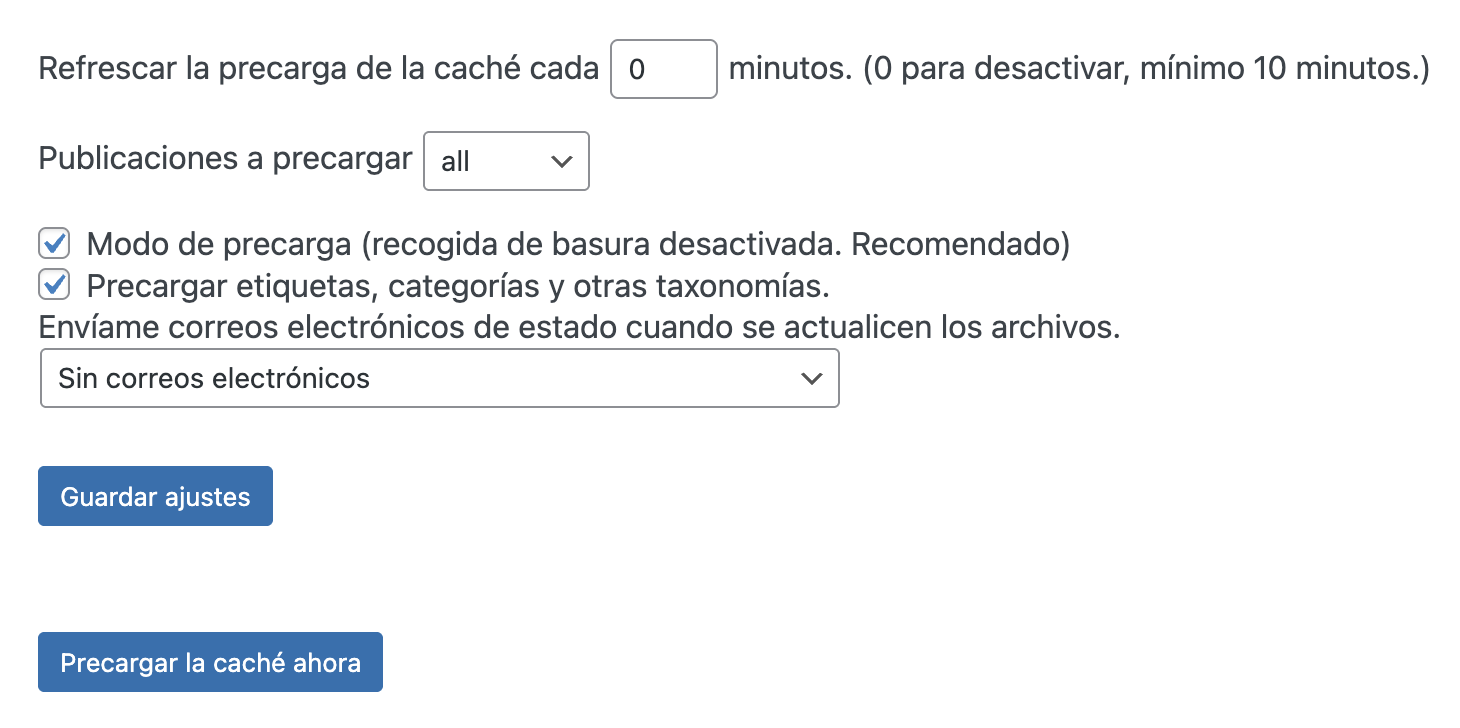
Key Tips
✔ Use a CDN (such as Cloudflare) alongside WP Super Cache.
✔ Avoid additional caching plugins to prevent conflicts.
✔ Keep WordPress and the plugin updated to the latest version at all times.
Properly configuring WP Super Cache improves your site's speed and stability. Follow these steps to optimize it and avoid common issues.