How to Create Email Accounts in cPanel
In this article, you will learn how to create an email account in cPanel so you can send and receive information with your clients.
Follow the simple steps below to create your email account in cPanel on your active hosting service.
- Log in to your cPanel account by adding port 2083 to the end of your domain, for example: https://yourdomain.com:2083 and sign in with the credentials that were sent to your email address.
- Look for the "Email" section and click on "Email Accounts".
- Click the "Create" button located on the right side of the page.
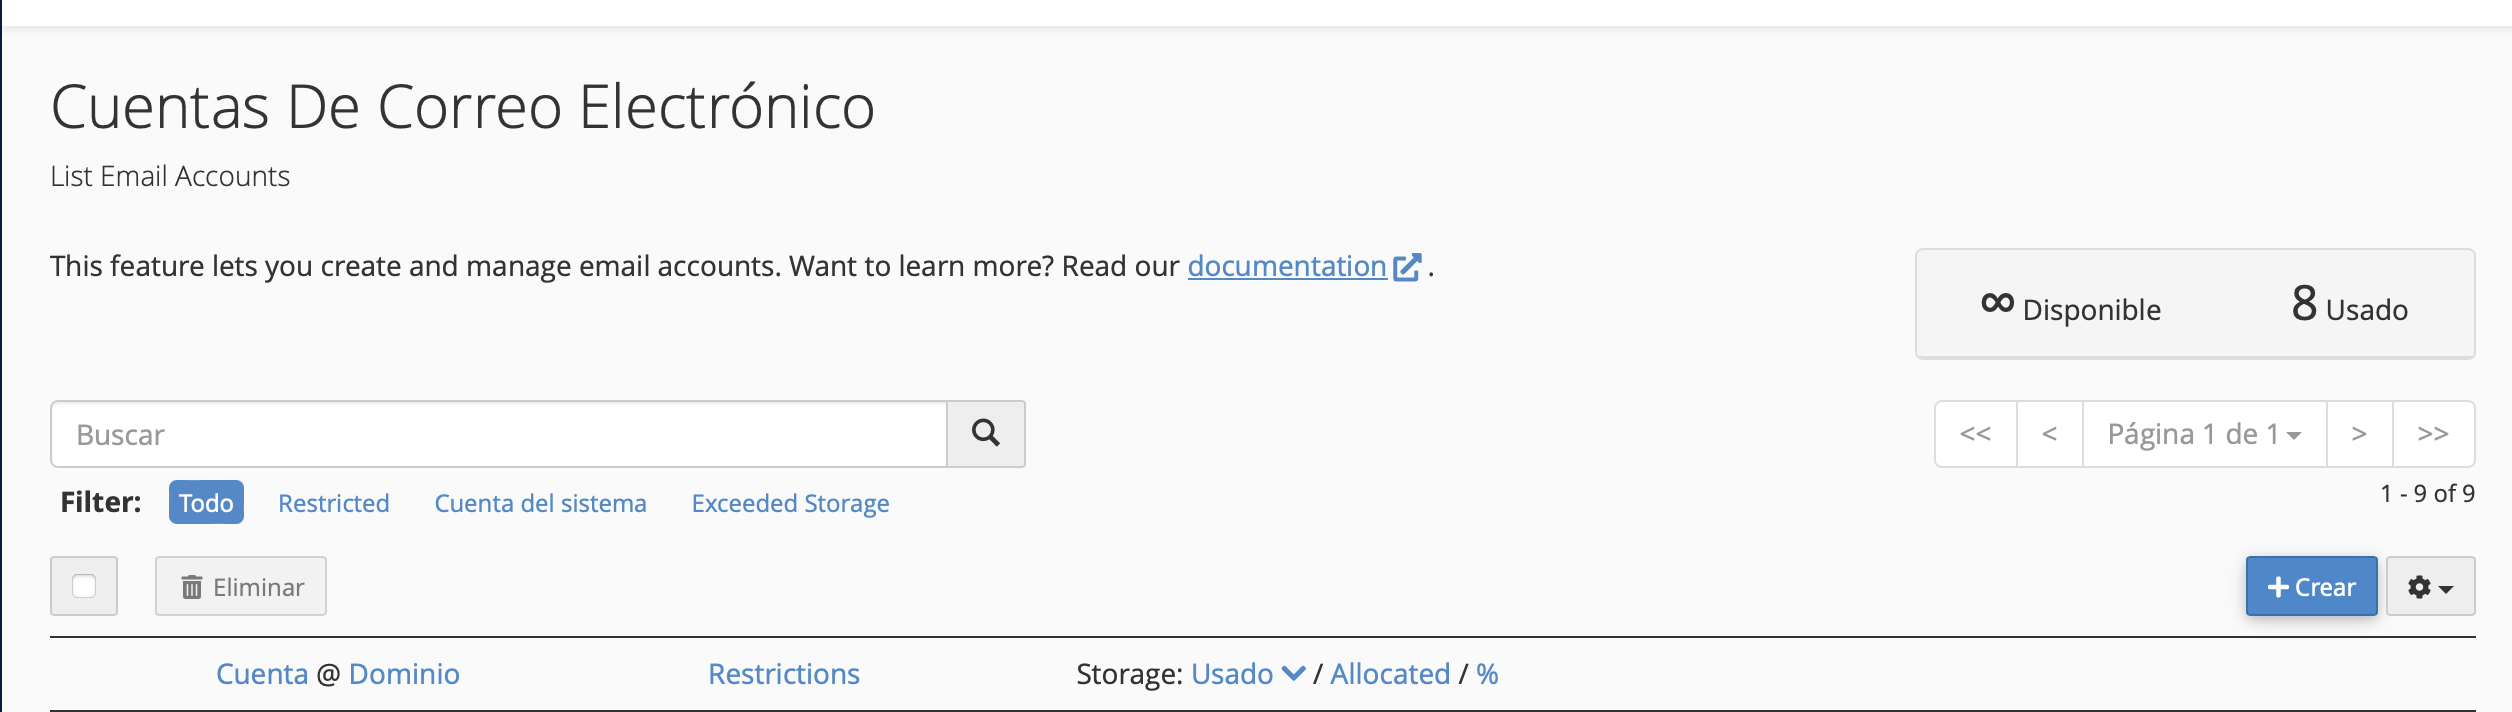
- You will see a form to create a new account. Here you need to enter the following information:
- Email address: Enter the name you want for your email address. For example, if you want to create an email address for your business, you can enter "sales" or "contact" followed by "@" and your domain name. Example: sales@mydomain.com
- Password: Enter a secure and easy-to-remember password for your new email account.
- Mailbox quota: Here you can set a storage limit for the email account. You can leave it at the default value or adjust it according to your needs.
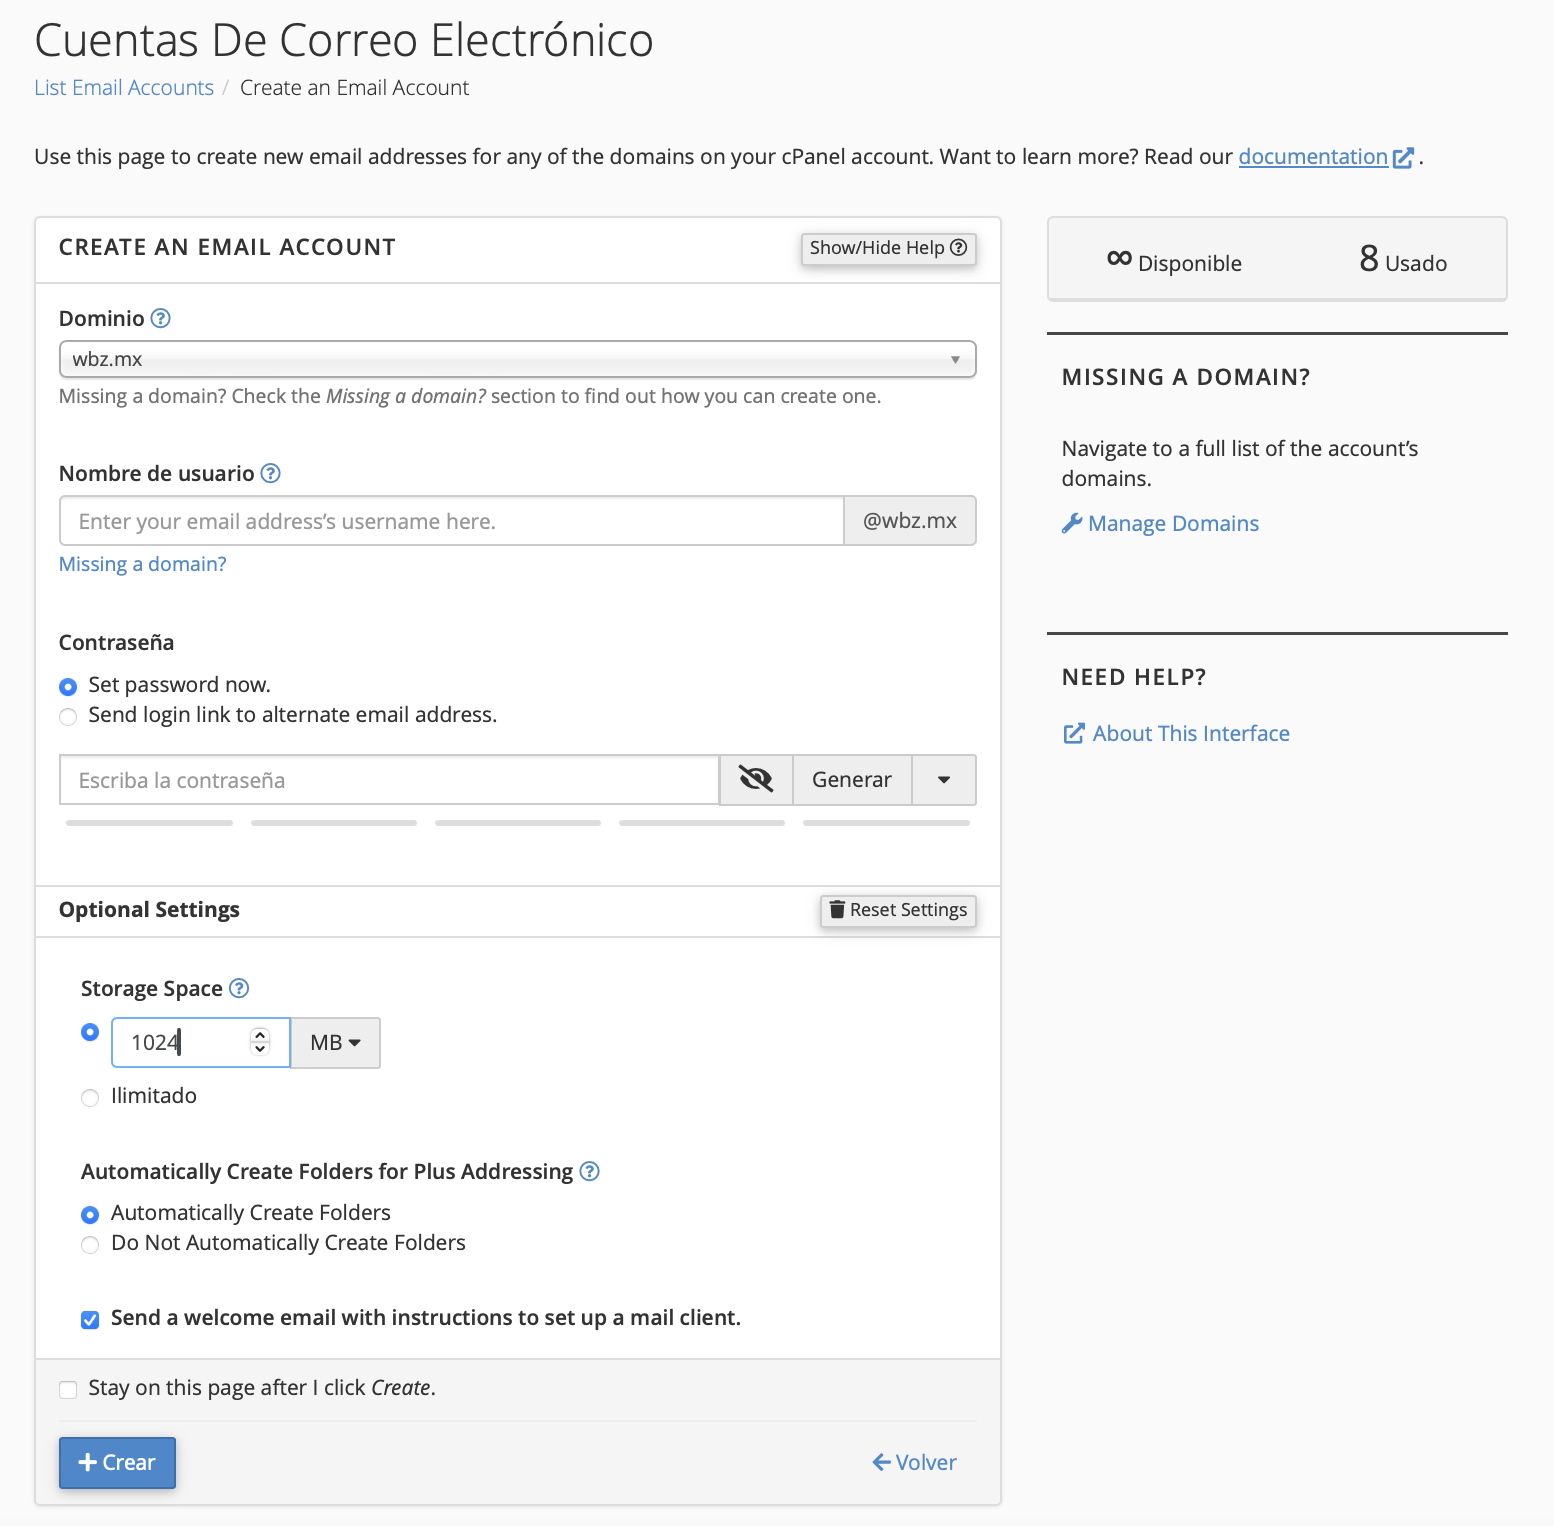
- Click "Create" and your new email account will be created immediately.
- Once the account has been created, you can access it via webmail at https://webmail.mydomain.com (make sure to replace mydomain.com with your actual domain).
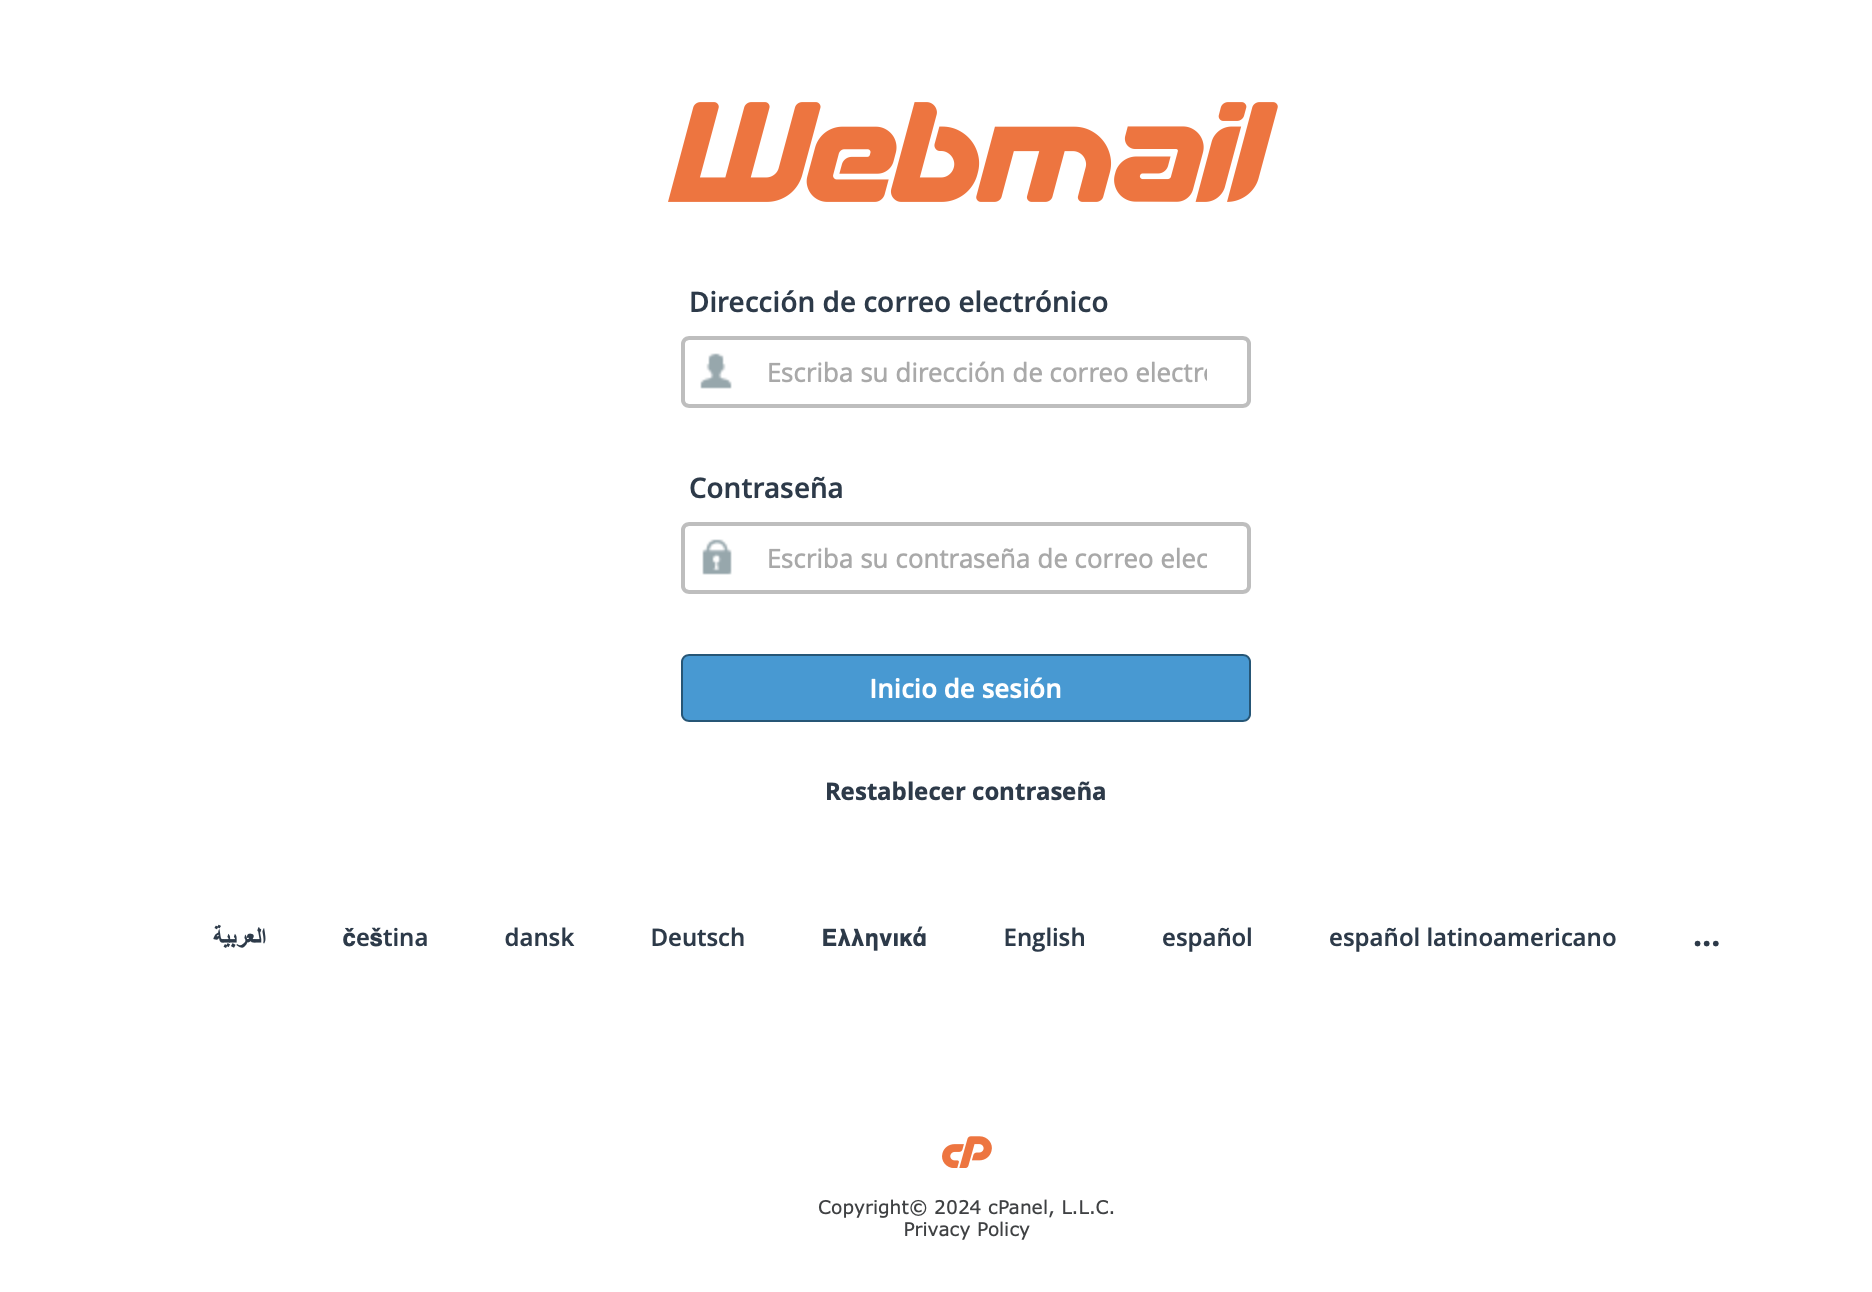
That's it! Now you know how to create an email account in cPanel. Remember that you can create multiple email accounts according to your needs.
Now that you have created your email account, you can find detailed instructions for setting up your email in different applications and devices at the following links:
- Outlook: Follow the step-by-step guide at Set up your email in Microsoft Outlook
- Thunderbird: Find the instructions at Set up your email in Mozilla Thunderbird
- iPhone and Android: Learn how to set up your email on mobile devices at How to set up email on iPhone and Android
- General email client settings can be found at: Email Client Settings
These guides will help you complete the email setup on any platform you use. If you need additional help, don't hesitate to contact us.